
How to Create a Safe Montessori Yes Space for Babies in a Small Living Room
Before we get to how, let's start with why. Why did I gate off half a room instead of babyproofing the whole room? Why not just get a playpen?
The answer: I lived in a 750 sq foot London flat with twins! No amount of babyproofing could make our living room entirely safe for my one year old twins, and I needed somewhere for them to play on their own when I run to the loo, answer the door, get their meals and milk ready etc.
More than that, I was looking for a 'yes space' - an enclosed space that is entirely safe for babies or toddlers. The term was coined by Janet Lansbury, based on the concept developed by Magda Gerber. Janet describes a yes space this as 'a gift to both children and their parents. It offers children ownership of a safe place that encourages play, learning, creativity, agency, and a strong sense of self. Parents get to enjoy one the great pleasures of parenting – observing their infant or toddler as they explore and master the world around them.'
I initially thought about getting a playpen, but decided it would be too small for my twins and too great of a separation from the rest of the room. I did some online searches and settled on a room divider, but couldn't find any posts online emulating what I hoped to create - hence me writing this blog!
How I created our yes space
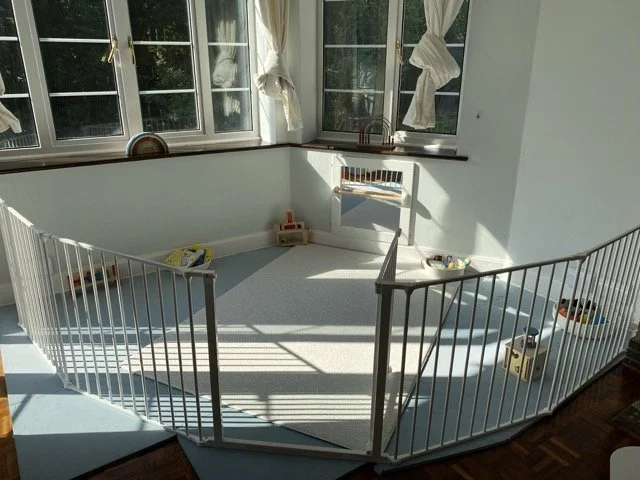
1. Chose a gate. After looking at options, I purchased the BabyDan Flex XXL * room divider from Amazon. While I initially found the idea of bars a bit off-putting (baby jail!) the more I read about yes spaces the more I saw the potential advantages of dividing our living room. It enabled the babies and I a clear line of sight (unlike mesh or thick plastic playpen), it blended into our neutral/Scandi decorated living room as well as anything could, and gave them something to pull up on and cruise along.
I followed the instructions included with the gate and found it easy to put together. The gate section swings both in and out and I'm able to open and close it with one hand when carrying a baby, though I usually just step over it! The gate attaches to the wall via a few screws and can easily be removed if/as you need, leaving just the wall fixture. Our concrete walls/brick fireplace are hard surfaces to drill into, so I had a handyman put the gate up for me. I ordered two gate extensions to ensure we got the right fit. In order to maintain it's strength and integrity the gate sections need to be fixed at an angle (rather than a straight line across the room) so I found it a bit hard to estimate the exact length I would need until the gate was in place. In the end I only needed one extension so returned the other.
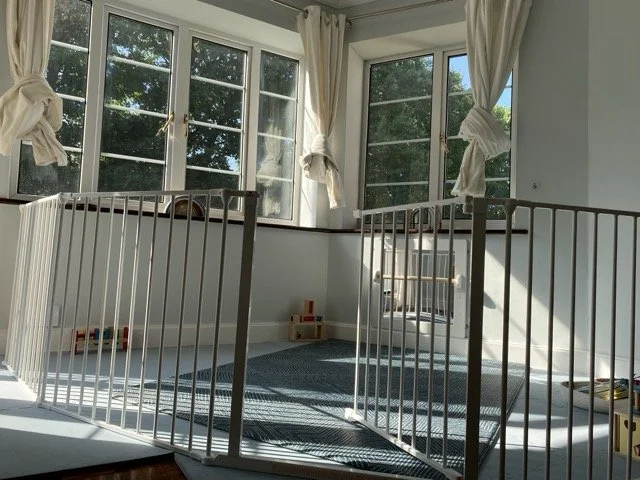
Yes area from view of child
2. Installed soft flooring. As you can see from the photos, the corner of the room I made into a baby area is near a bay window and has lots of angles! The floor is parquet and I wanted wall to wall soft flooring in the play area, so based on the size of our space and colour options I opted for 50cm EVA foam squares in Sky Blue, similar to these. I used a box cutter to cut the tiles to size for the awkward corners. The tiles weren't cheap (well over £100) and aren't perfect (my twins love to pull the edges up, they are wipeable but also mark/stain more easily than my other playmat ), but they do the job well, providing wall to wall padding.
I already owned a reversible Totter and Tumble play-mat and laid this on top of the floor tiles for extra padding and a nice aesthetic. I absolutely LOVE this mat, it is hands down one of the best baby related purchases I made.
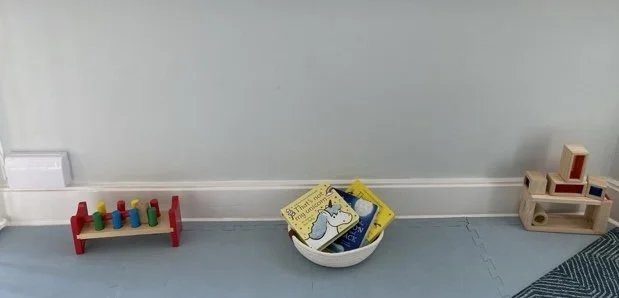
Toy baskets and socket protector
3. Completed final babyproofing. In order to make it a completely safe area for our twins, I had two last things to do: cover the power outlets and ensure the floor length curtains were out of the way. I knew our twins would immediately gravitate to the power outlets and it's apparently unsafe to use the plastic plugs, so I opted for Electrical Plug Socket Protector. They were easy to install and cover the entire plug, while still allowing access to the socket should we need it.
The only solution I could find for the floor length curtains was to tie them up in a simple knot during the day, and untie and close them at night. Not ideal visually, but if left down my twins tugged on them and risked pulling the whole rod down!
4. Added accessories and toys. I purchased half a dozen white cotton rope baskets from Amazon and they are perfection. I tend to put together baskets with sensory items (different fabrics, etc) and toys (a basket of different balls, musical instruments) and rotate them based on what the babies are interested in on a given day. I also added a few large cushions to make a ‘cozy corner’ - perfect for resting, drinking bottles or reading books.
As there isn't any furniture in their yes space for them to pull up on, I bought a Montessori mirror-barre from Etsy. It has a baby safe mirror and the bar can be adjusted to three different heights. The twins absolutely love it, and after a few tumbles while they got the hang of it, they have become pros at pulling themselves up and cruising along it. It has helped improve their gross motor skills, strength and balance, and is a lovely addition to their space.
Overall verdict
While their play are in its current configuration won't be suitable forever, it is perfect for rolling to crawling and learning to walk stages and has proved great for both the twins and I.
* This post contains affiliate links. If you click and purchase, I may earn a commission at no extra cost to you.